
I really didn't think this project would take this long to complete. I had made the mistake of ordering a venti cold brew from Starbucks at around 7 the night before and ended up staying up until four AM thinking up the basic design for this project.
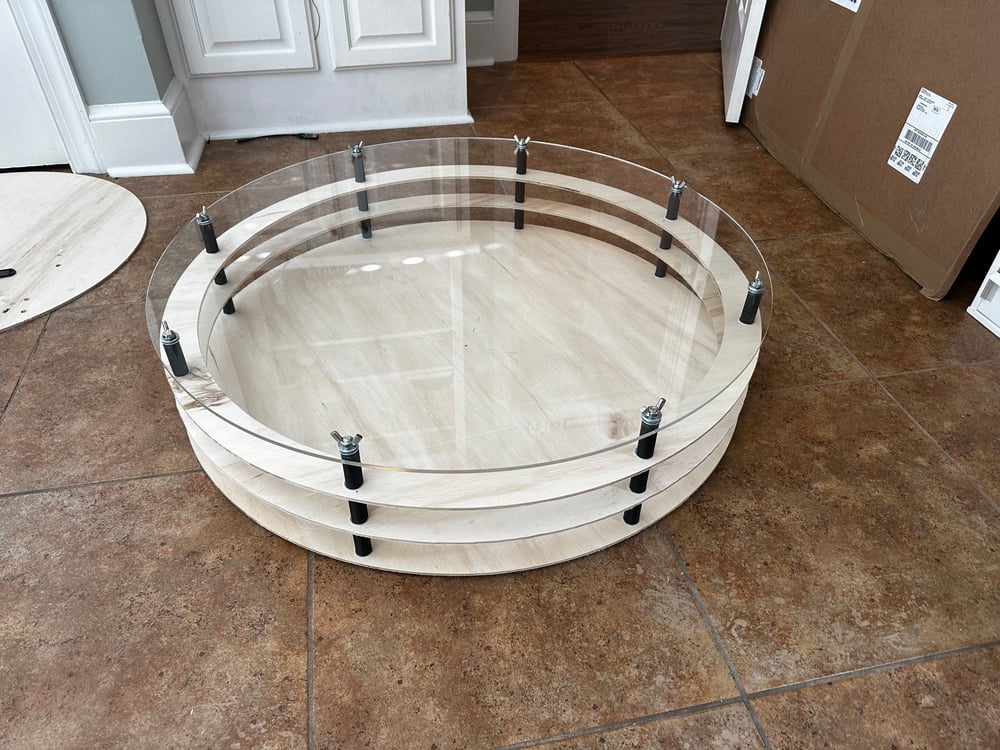
I wanted to go for a modern and handmade look for the build, so I thought about a series of plywood sheets stacked on top of each other with black metal hardware to space them out.
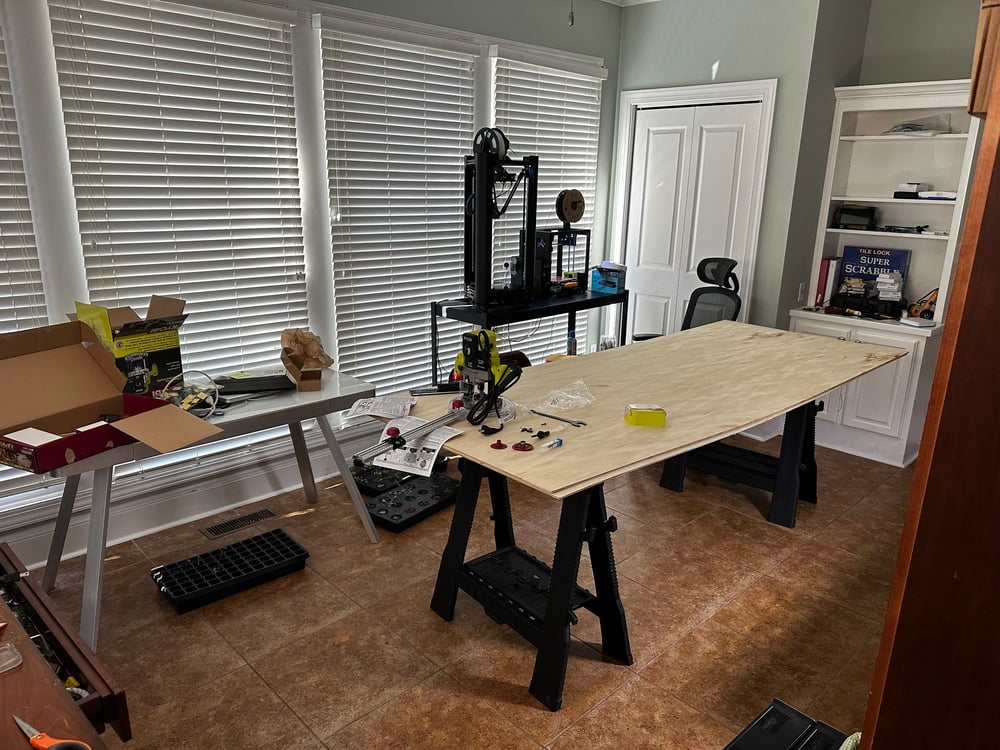
The first thing I did when I woke up was run straight to Home Depot to get the plywood sheets, and the necessary tools to cut perfect circles.
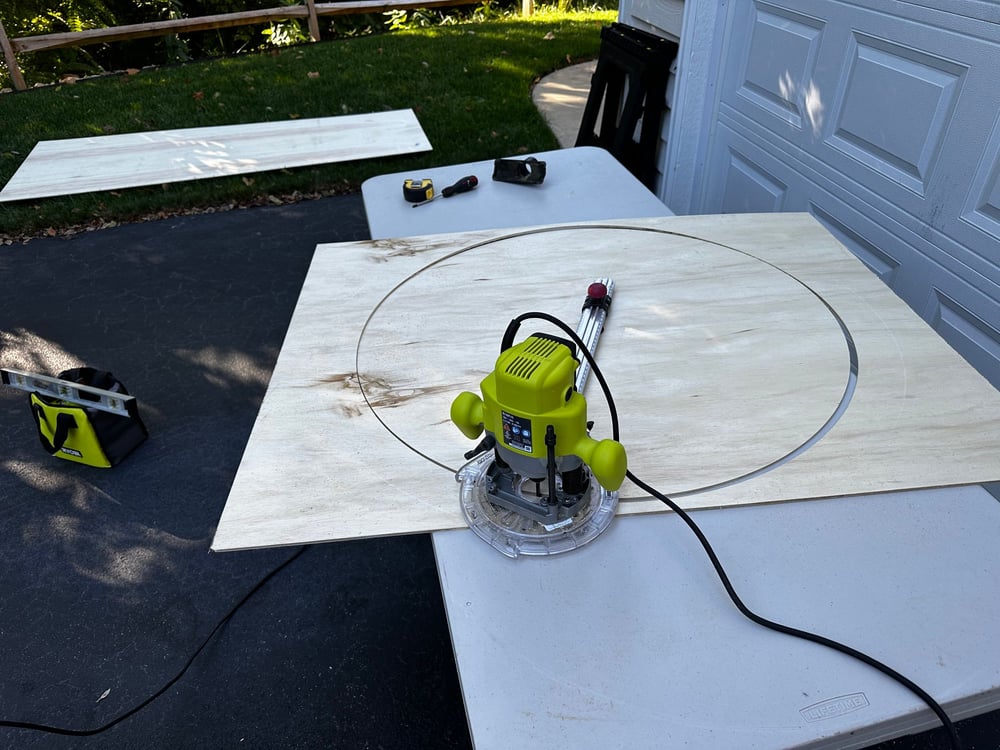
I started by cutting out four circles from the plywood sheets. One would be the base and it was 3' in diameter. Two were going to be the inner 'spacer' sheets, and they were also 3' in diameter, but they had a circle cut out of the middle to give them two inches in width. The fourth one was going to be the top that goes underneath the glass, and it was cut the same, but with a three inch width.
I assembled these pieces to get a feel of what the table end up looking like and this was when I realized that the project was going to take a lot longer than I thought it would.
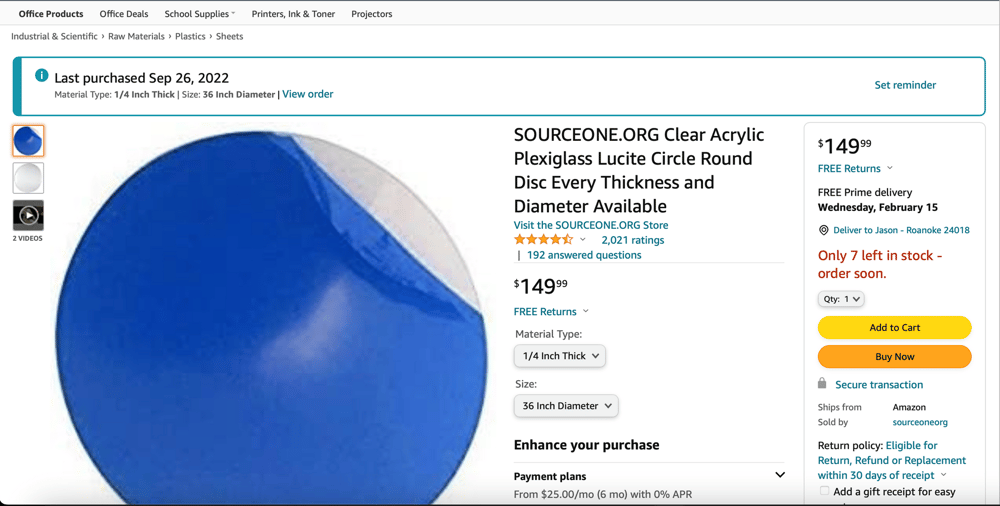
I ponied up the insane amount of $150 for a thick sheet of acrylic to be the layer that the sand lays on. I needed it to be thick enough to prevent warping as I didn't want the mechanism to work against the downward force of the sheet.
Putting all the table components together so far really showed me how big this thing was going to be!
I was going to originally reuse the geared mechanism from my older Sand Table project, however, I didn't realize that the gears required would be over a foot in diameter. Time for a redesign!
I took a ton of inspiration from the mechanism featured in the SandSARA, a project I saw on Indiegogo, which I actually got the idea for the older project for. As soon as I started putting it together, I found that it was lighter, faster, and had much less slack in it's movements. It was everything I wanted. Or so I thought...
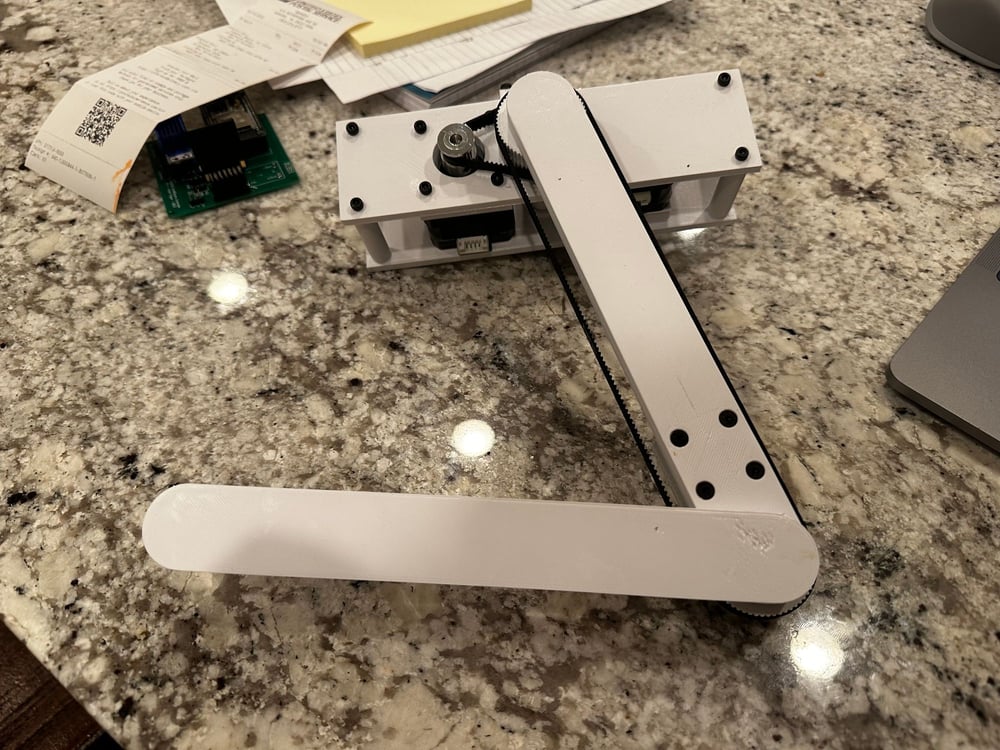
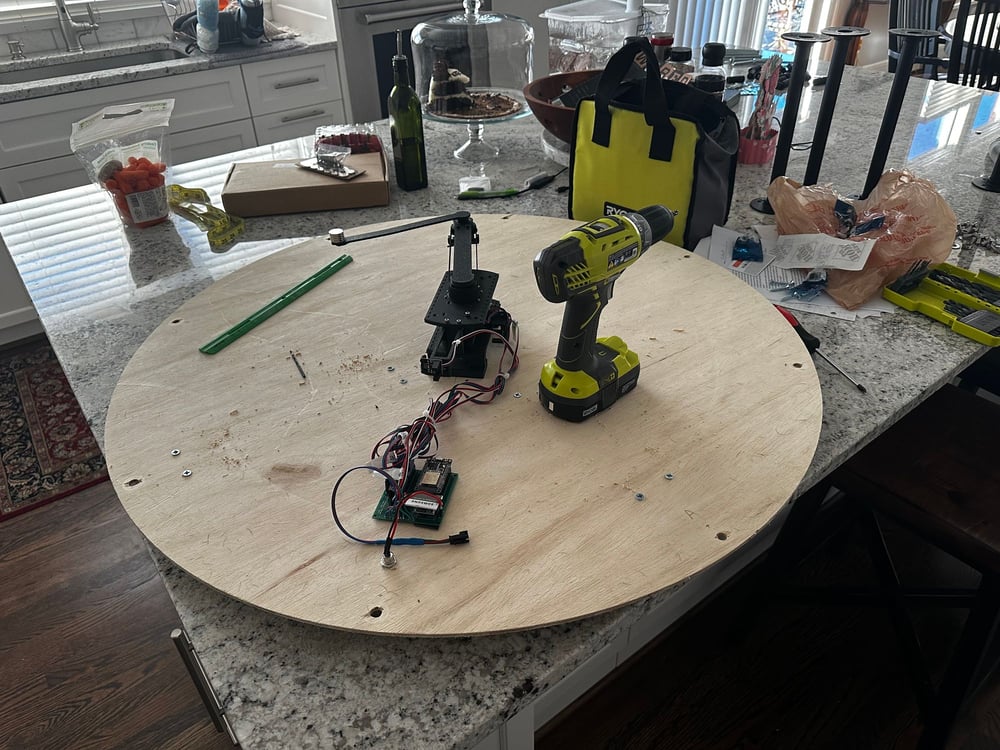
I soon realized that the motors were getting just warm enough to soften the PLA plastic used, and the movement axis bent down as the central pivot point wasn't secured tight enough.
It was... better. I used more screws and keyed the axis arm attachment points to reduce sloppiness even more, but I was still running into the motor heat problem even with Trinamic's stealthChop2, and the lower arm still sagged down to an unusable degree. However, I added optical endstops to this design so I was able to start work on the firmware.
I already had firmware to draw lines in sand, however it was dependent on an external web host, and an additional ESP8266 to run the LED lights. I made many modifications to the code, including adding FastLED on Core 0, which was currently being unused. I also rewrote the entire original SandSPA web app in Vue 3 and compressed it enough to fit on the SPIFFS filesystem. I'll talk more about the improvements below, but for now, here's more info on how the actual robot runs.
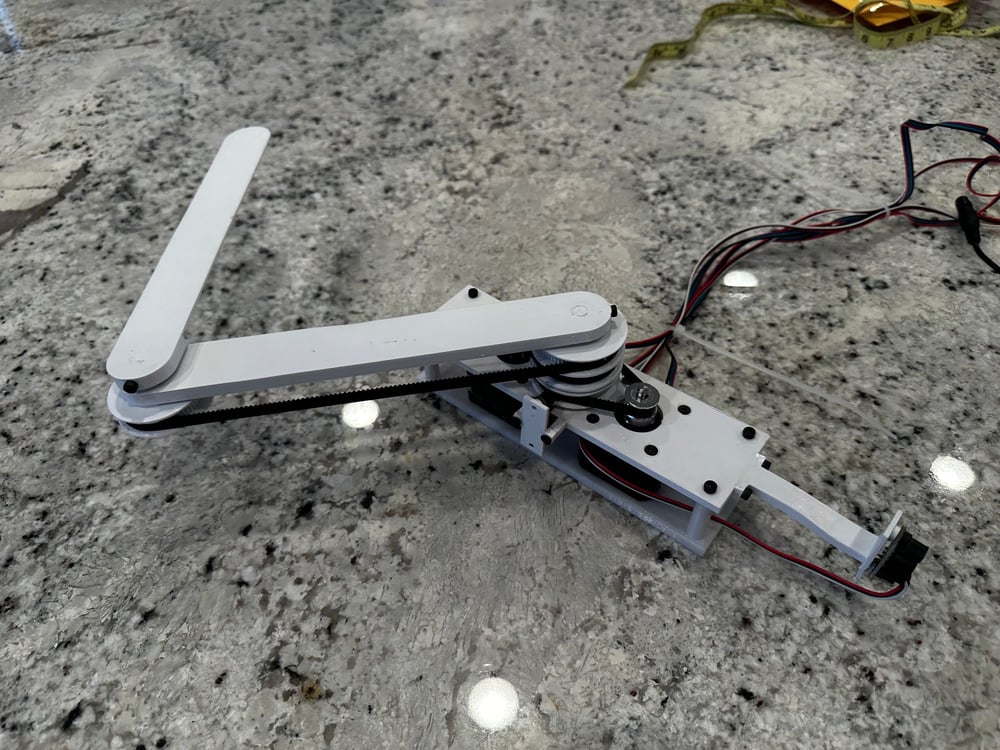
I got a new printer around this time and to fix the heat issue, I reprinted this mechanism in ABS plastic with a redesigned center axis and thicker support columns and it worked great!
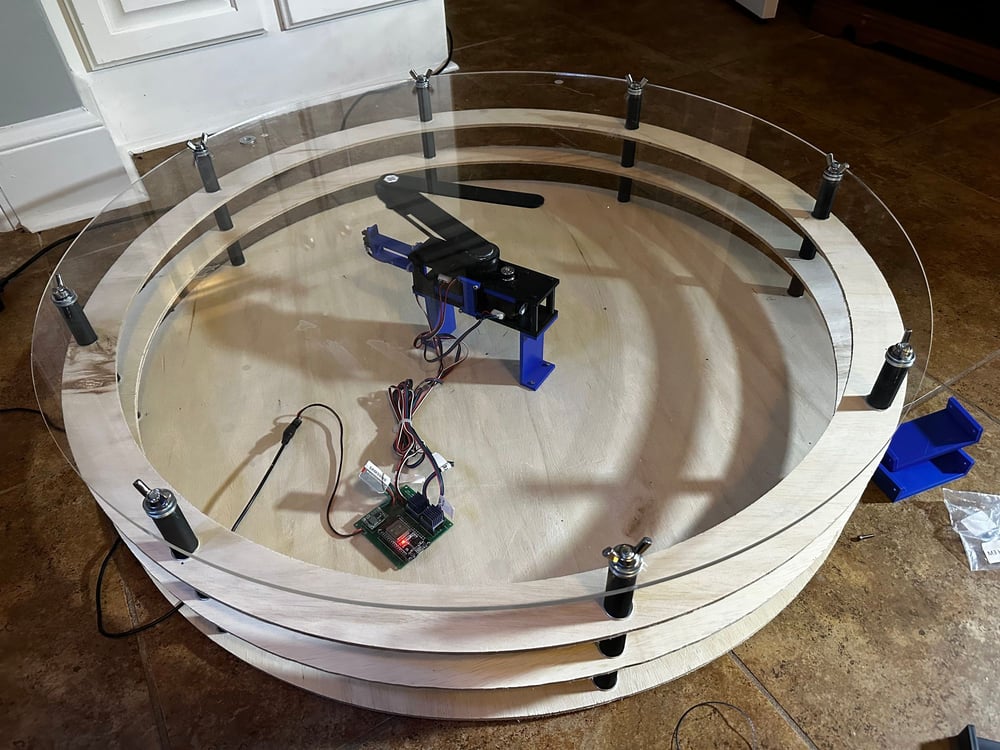
I now had a working robot underneath the table, and I needed a way to keep the sand inside the top of the table without spilling all over the place. I designed a large ring in Fusion 360, printable in sections, that would be attached to the top of the table and then sealed with black silicone sealant. Unfortunately, I don't have a photo of this process. This ring has a mating lock on the top that links with the upper wood piece.
I then put black felt on the inside of the sand bed to muffle the sounds coming from the sand while the ball was rolling over it.

The original table used TMC2310 stepper drivers, and while they were quiet, I thought they could've been quieter. In the new 3D printer I just put together, I used TMC2208 stepper drivers with Trinamic's new stealthChop2 algorithm. However, they used a completely different setup sequence and required a serial connection to the MCU.
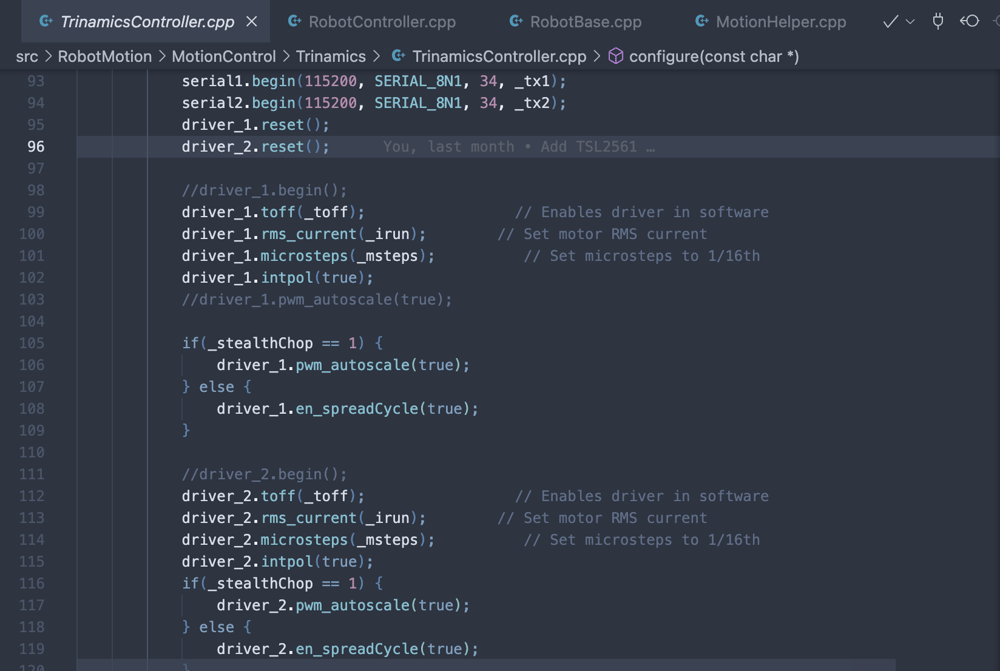
In the firmware, I rewrote the MotionController class to send the setup parameters on startup and they're able to be edited in the mechanism's JSON configuration file.
The Web UI is a simple Vue app written with the Quasar framework, and in the original version, the web UI was also hosted on an external server which communicated to the table over WebSockets. The table itself only hosted a small HTML page stored in flash with control and debug buttons. Modifying the webpack steps for the Vue app, I was able to truncate the file names and gzip the contents enough to fit onto the 1MB SPIFFS partition of the ESP32. Now, the table's fully independent and can be operated without an internet connection.
I added status messages for the current sequence item number and controls to "skip/rewind" a track to add more functionality to the UI.
The table looked great on the floor, but the dogs were a bit too interested in it, so I realized I needed to add some legs to get it up off the ground. I also ordered a 3' sheet of tempered glass to place on top of the top wooden circle to keep them out.
I started by taking the entire table apart to get to just the bottom frame, and I put 2x4s in an X shape underneath to strengthen the thin plywood so I would be able to securely attach the legs.
I flipped over this assembly onto a few of the barstools and drilled pilot holes for the leg mounts. I decided to use some black metal pipe legs that I found on Amazon as they fit with the existing hardware.
I then screwed these mounts in and put the legs on. It looked great! It was time to reassemble the table and put it back in the living room.
The last step was to stain it to make it look like a real piece of furniture, so I used the same stain that I used in my SmartMatrix project as it just so happened to also match the rest of the wood furniture in the room.
I'm so happy this project is finally done, and I learned a ton along the way. There's still a few improvements I want to make, but for the most part, it turned out exactly how I had imagined all the way back in September.
Here's the GitHub links for the firmware & web UI
 GitHub • acvigueGitHub • acvigue