
Overview
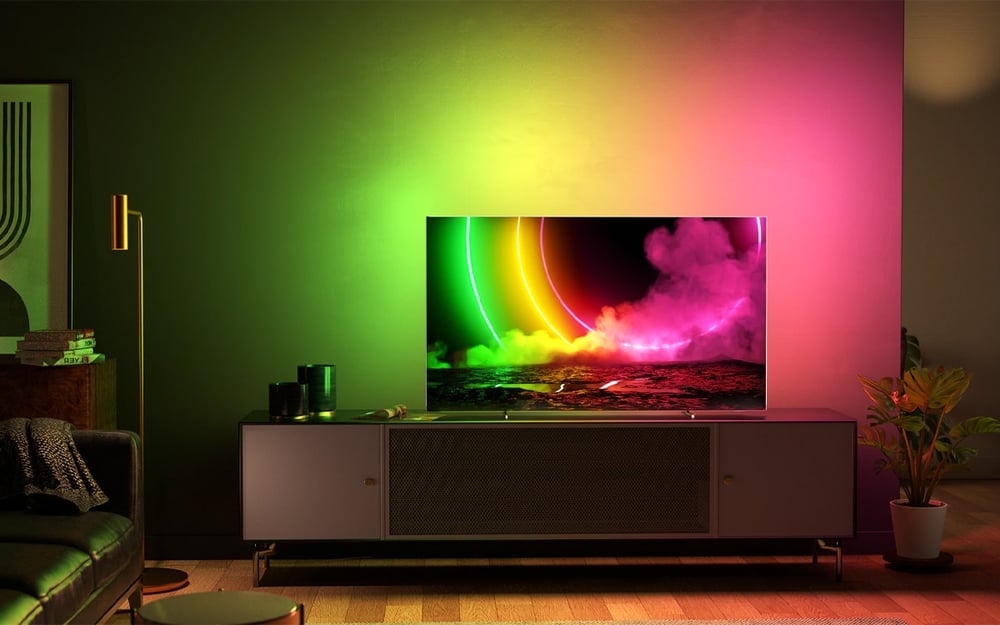
I've always loved Phillips' line of ambient lighting-enabled TVs. However, they're surprisingly quite difficult to obtain in the US due to manufacturer differences & licensing issues...
This seems like something that a quick trip to Aliexpress could solve!
I planned to use a Pi 4 with a USB capture card with HDCP passthrough to connect to a WLED control board over a serial connection to show the ambient light effects.
I've also taken the TV's back panel off before for a past project and I knew there was a ton of space in there, so I wanted to have this all fit inside the TV.
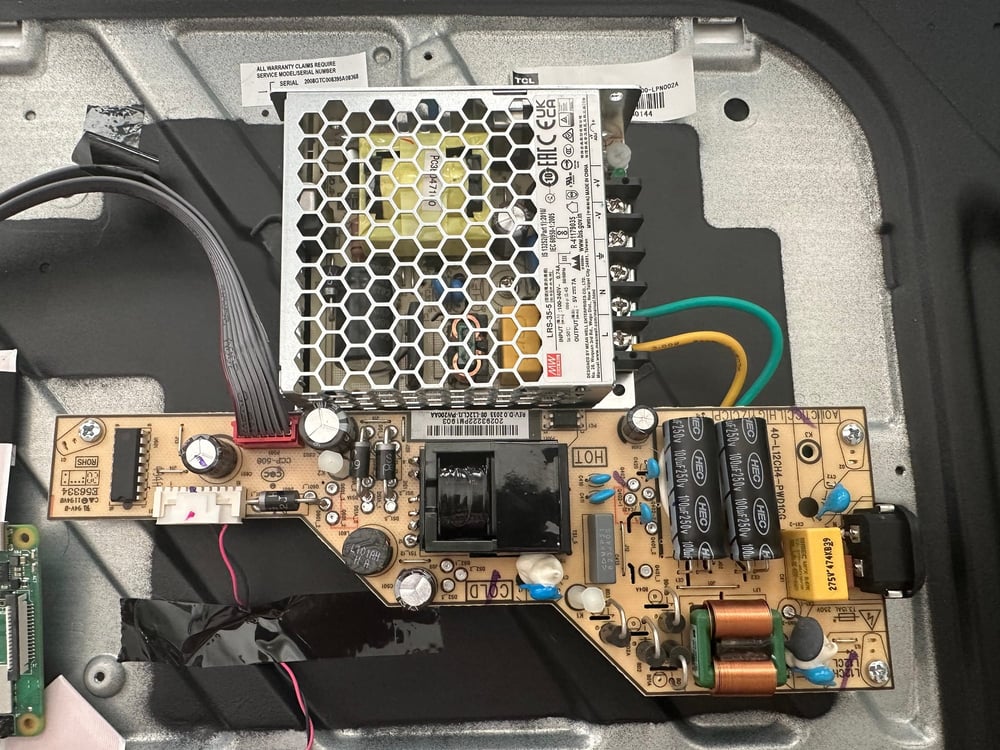
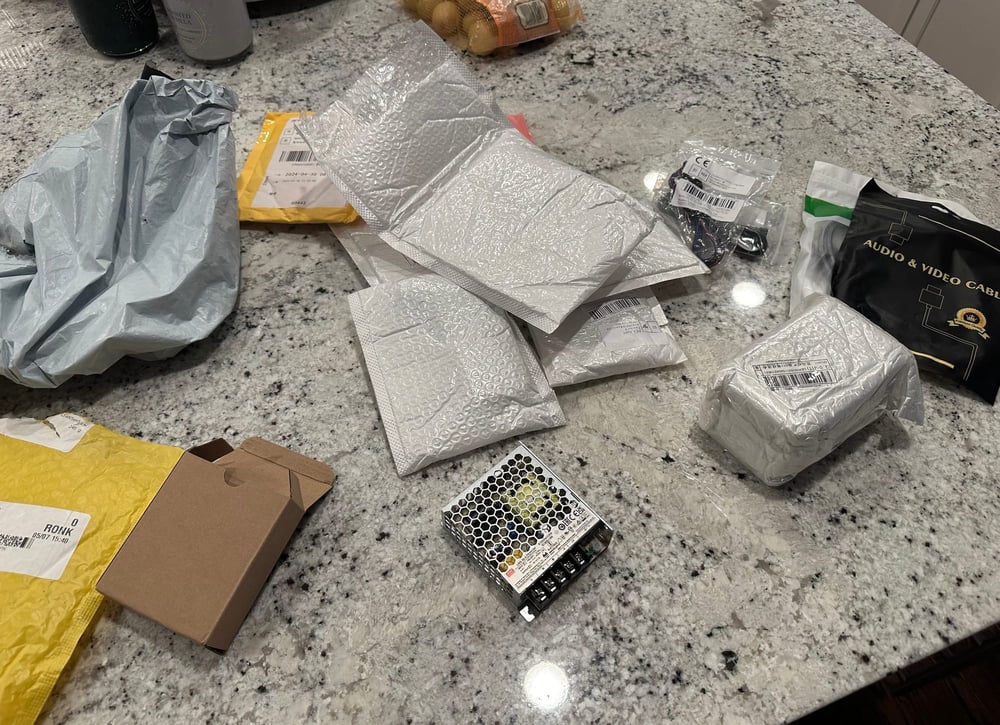
I started by connecting the 5V power supply to the AC power inlet built into the TV and mounting it with heavy-duty VHB tape. If the power supply were any larger, it wouldn't have fit! The one that I used was a 35-watt Mean Well.
I wanted to use one of my custom WLED controller boards to drive the LED strip as they could show different effects even when the Pi was turned off. However, the boards were designed for use with clockless LED strips, so I had to solder the clock and data wires directly to the ESP32 module.
I used my Dremel to remove some of the plastic on the mount for the TV's WiFi daughterboard and secured the WLED controller. I also mounted the Pi to the middle of the TV, but I should have put a plastic case on it first.
Mirror Remasking
This TV had a giant 30lb glass sheet mounted to the front of it since this TV was also used in my Smart Mirror project. It's almost been three years since then, and the vinyl masking on the mirror was starting to peel away.
I rarely have the TV down in this room to work on it, so I took this opportunity to remove it with a metric ton of isopropyl alcohol and remask it with spray paint.
After that, I provisioned the Raspberry Pi and installed HyperHDR. HyperHDR is a successor to the open-source Hyperion lighting project. It's been completely rewritten and features increased performance and HDR support.
 GitHub • awawa-dev
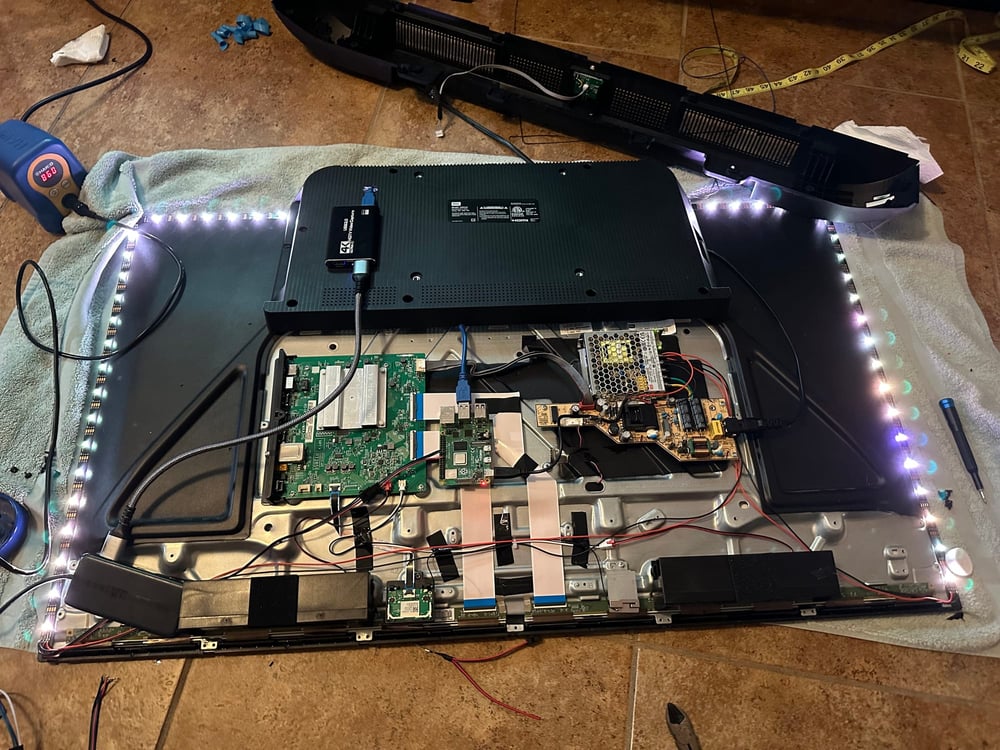
I drilled a hole in the back of the TV casing to accommodate the USB3 cable for the capture card and then mounted the capture card to the back with more VHB tape.